Partners management (exhibitors)
Manage partners spaces (stands)
Enhance your partners' and exhibitors' presence in your 3D immersive space and metaverse by providing them with dedicated spaces and stands. As the organizer and owner, you have the power to easily create and assign these spaces within your 3D immersive environment and metaverse. Once a partner space or booth is generated, the corresponding Backoffice is dynamically created in real-time and promptly shared with your partner via email.
When you click on 'Manage Partner Spaces,' you'll find a detailed list of all your partner spaces and stands. Effortlessly search by name, ID, company, and more for quick access.
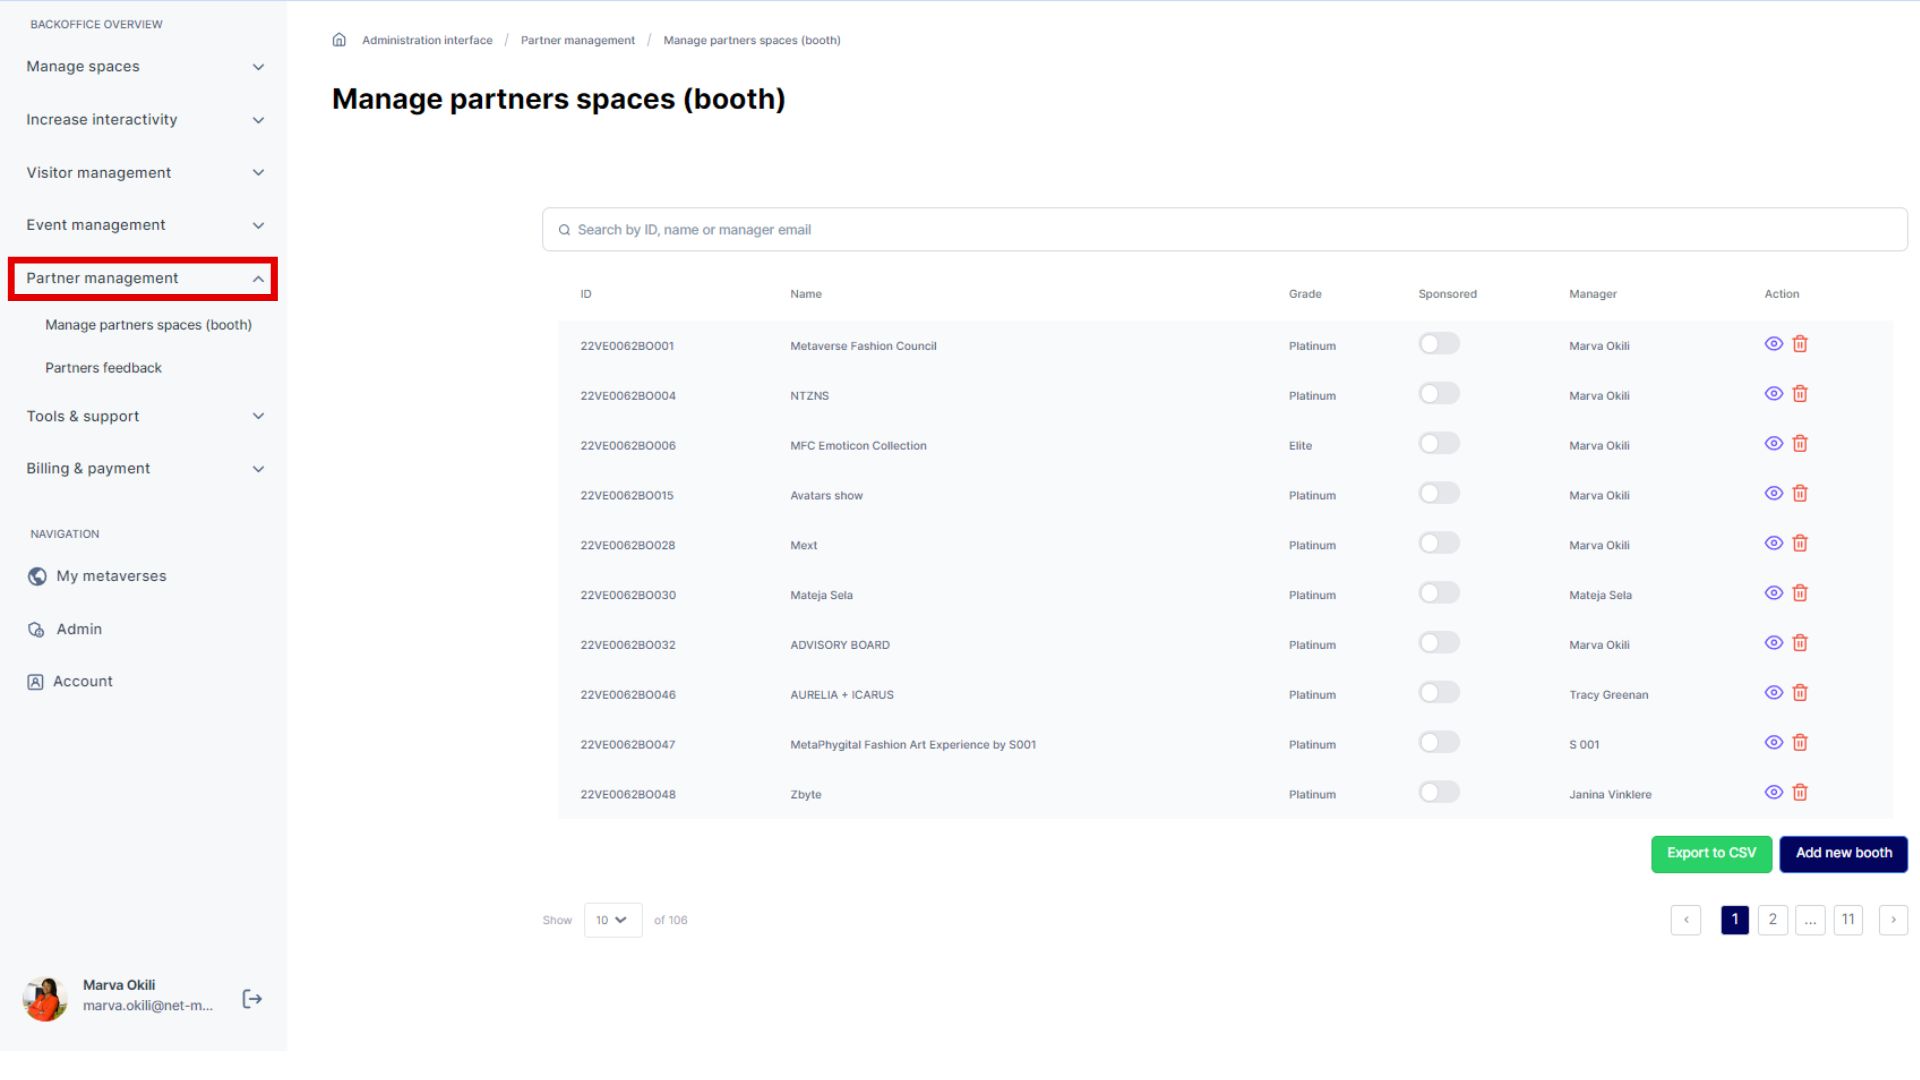
You can upload your booth list in CSV format if needed.
Click the** eye ico**n to view detailed information about your partners' spaces and stands, and use the trash icon to permanently delete a space and booth with a simple click.
Create a partner space
Available Options for Partner Spaces and Stands
Currently, you have two options for your partners and exhibitors “Pre-designed stands” and “Custom stand/spaces design”:
Pre-designed Stands:
Partners can choose from three available booth types and set them up immediately without assistance. However, they cannot modify the booth's shape and can only add elements like panels, posters, videos, or 3D elements. This offers a quick solution, allowing them to have their booth set up in less than an hour. A pre-designed partner’s space and stand comes with a dedicated partners’ dedicated Backoffice.
The available stand types include:
1. Silver Booth
The silver stand is the smallest option, featuring one side where you can display 1 video and 2 poster panels.

It's particularly convenient for startups with limited content or to be used as a reception desk.
2. Gold Booth
The Gold stand is of medium size, consisting of 2 parts:
- A. An external part, or the showcase, displayed within the main immersive 3D space and metaverse exhibition. It features 1 large video screen, 1 large panel, and smaller additional panels.
- B. A private showroom accessible to visitors via a click-through option. Here, partners and exhibitors can meet privately. The showroom is fully customizable, allowing partners and exhibitors to add panels and 3D objects as desired.
3. Platinum Booth
Platinum Stand The Platinum Stand is our most prestigious pre-designed stand, featuring:
- A. An imposing external showcase with a large video panel and 12 additional panels.
- B. A spacious private showroom accessible to visitors with a simple click-through option. Within this larger space, partners and exhibitors can meet privately. The showroom comprises multiple distinct areas and is fully customizable, allowing partners and exhibitors to add panels and 3D objects as desired.
Custom Booth Design:
As an administrator, you have the flexibility to engage with your partners to understand their specific requirements. Utilizing the Metabuilder tool, you can customize one of the existing booth types (Silver, Gold, or Platinum) to align with their unique design preferences. This empowers you to oversee the overall aesthetics of your partners' spaces and booths within your 3D immersive space and Metaverse, offering avenues for monetization as well.
Create a new partner space and Booth
Simply click** 'Add New Booth'** to initiate the creation of a new partner space and Stand.
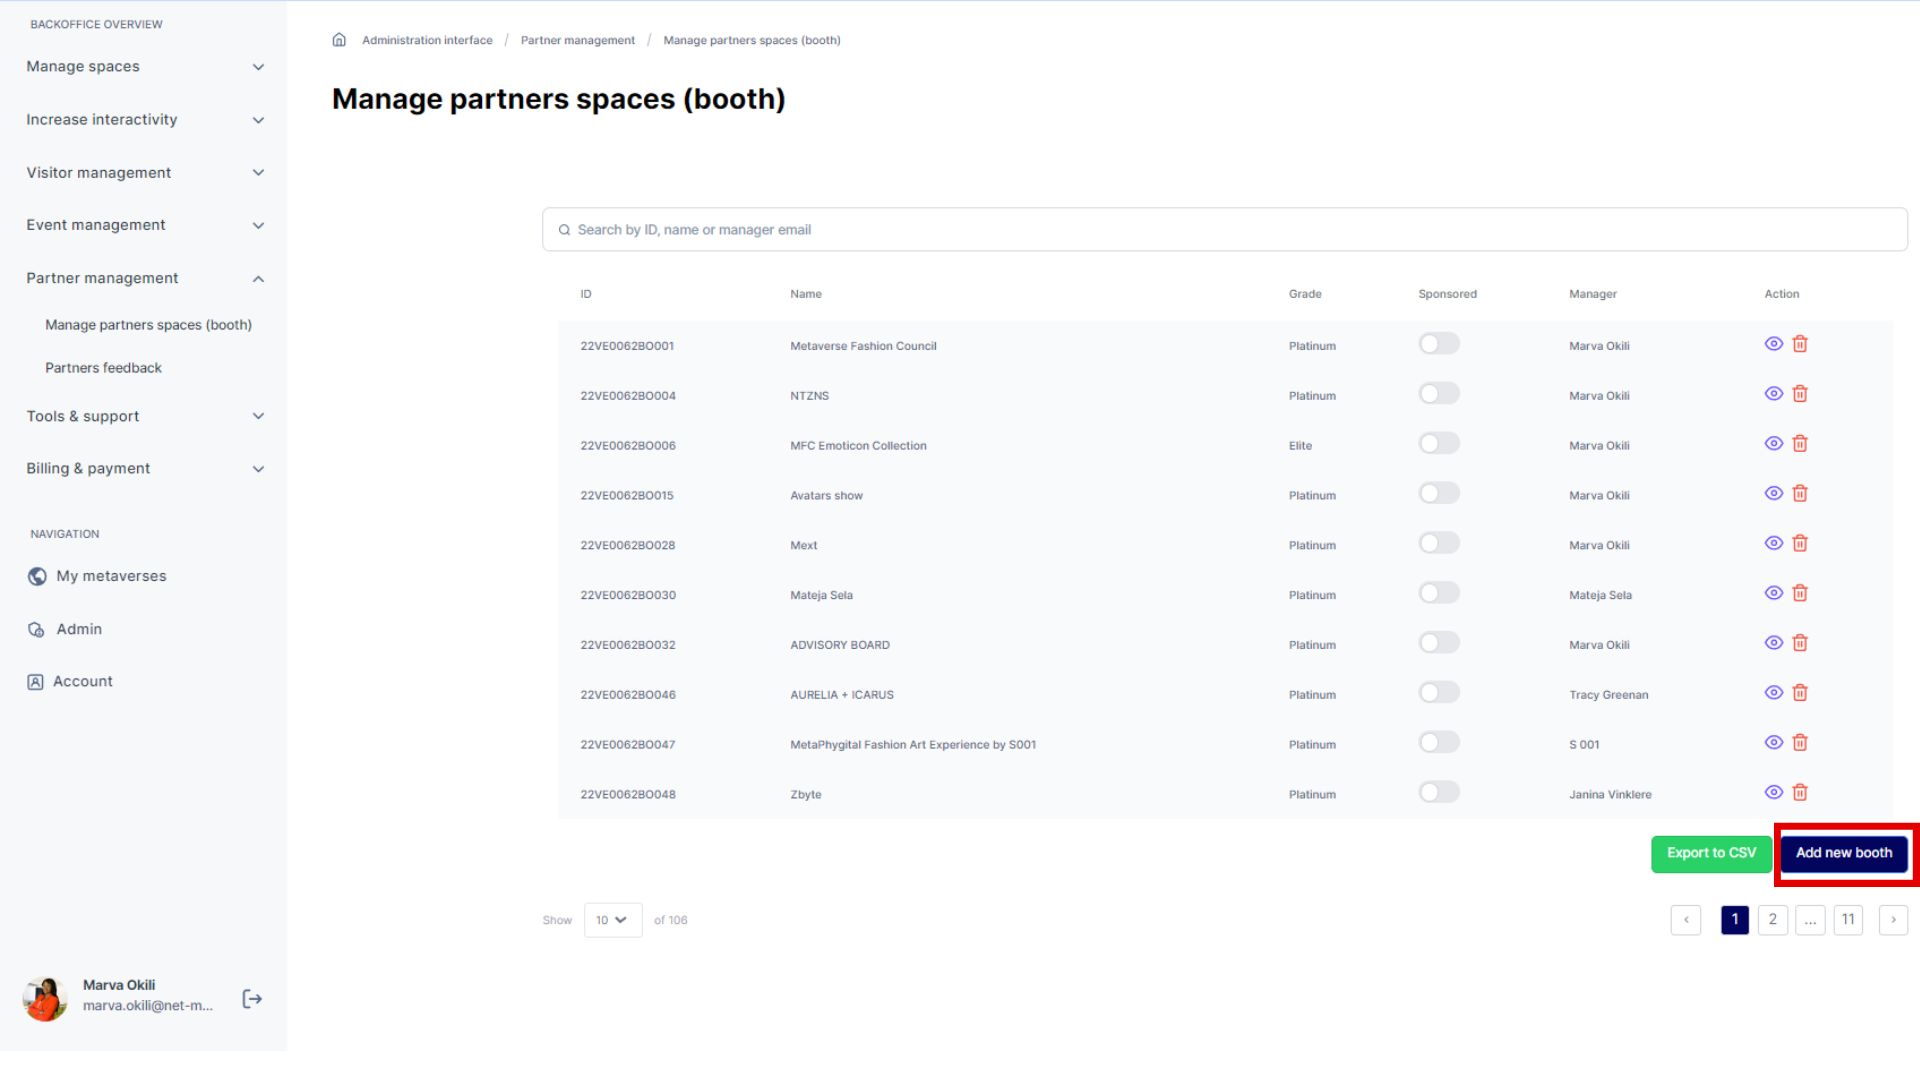
IMPORTANT: Ensure that the partner’s space and booth owner is registered before proceeding with booth creation.
Complete the form, choose the type (Silver, Gold, or Platinum), and confirm. An email containing the booth interface link is promptly dispatched to the exhibitor (stand owner), enabling them to upload content and manage the newly created stand.
Simply creating a new partner space and stand doesn't automatically make it visible to the audience. To showcase it within your 3D immersive space and Metaverse, you must position your partner's space inside using the Metabuilder. This task can only be carried out by the Metaverse Administrator and isn't accessible to partners and exhibitors.
Place the partner space and booth
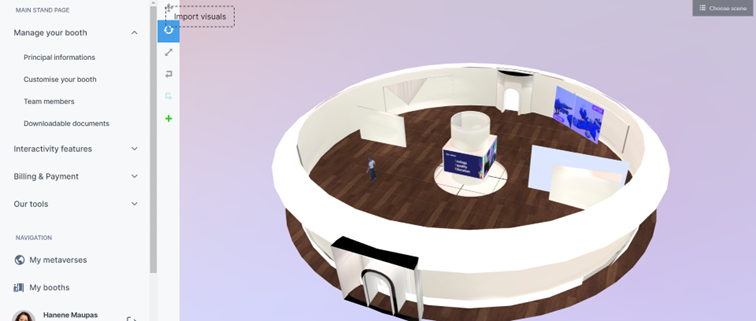
To place a partner space and stand inside your own immersive space and metaverse, navigate to the** 'Create/Edit 3D spaces ' **section and click on the '+' icon.
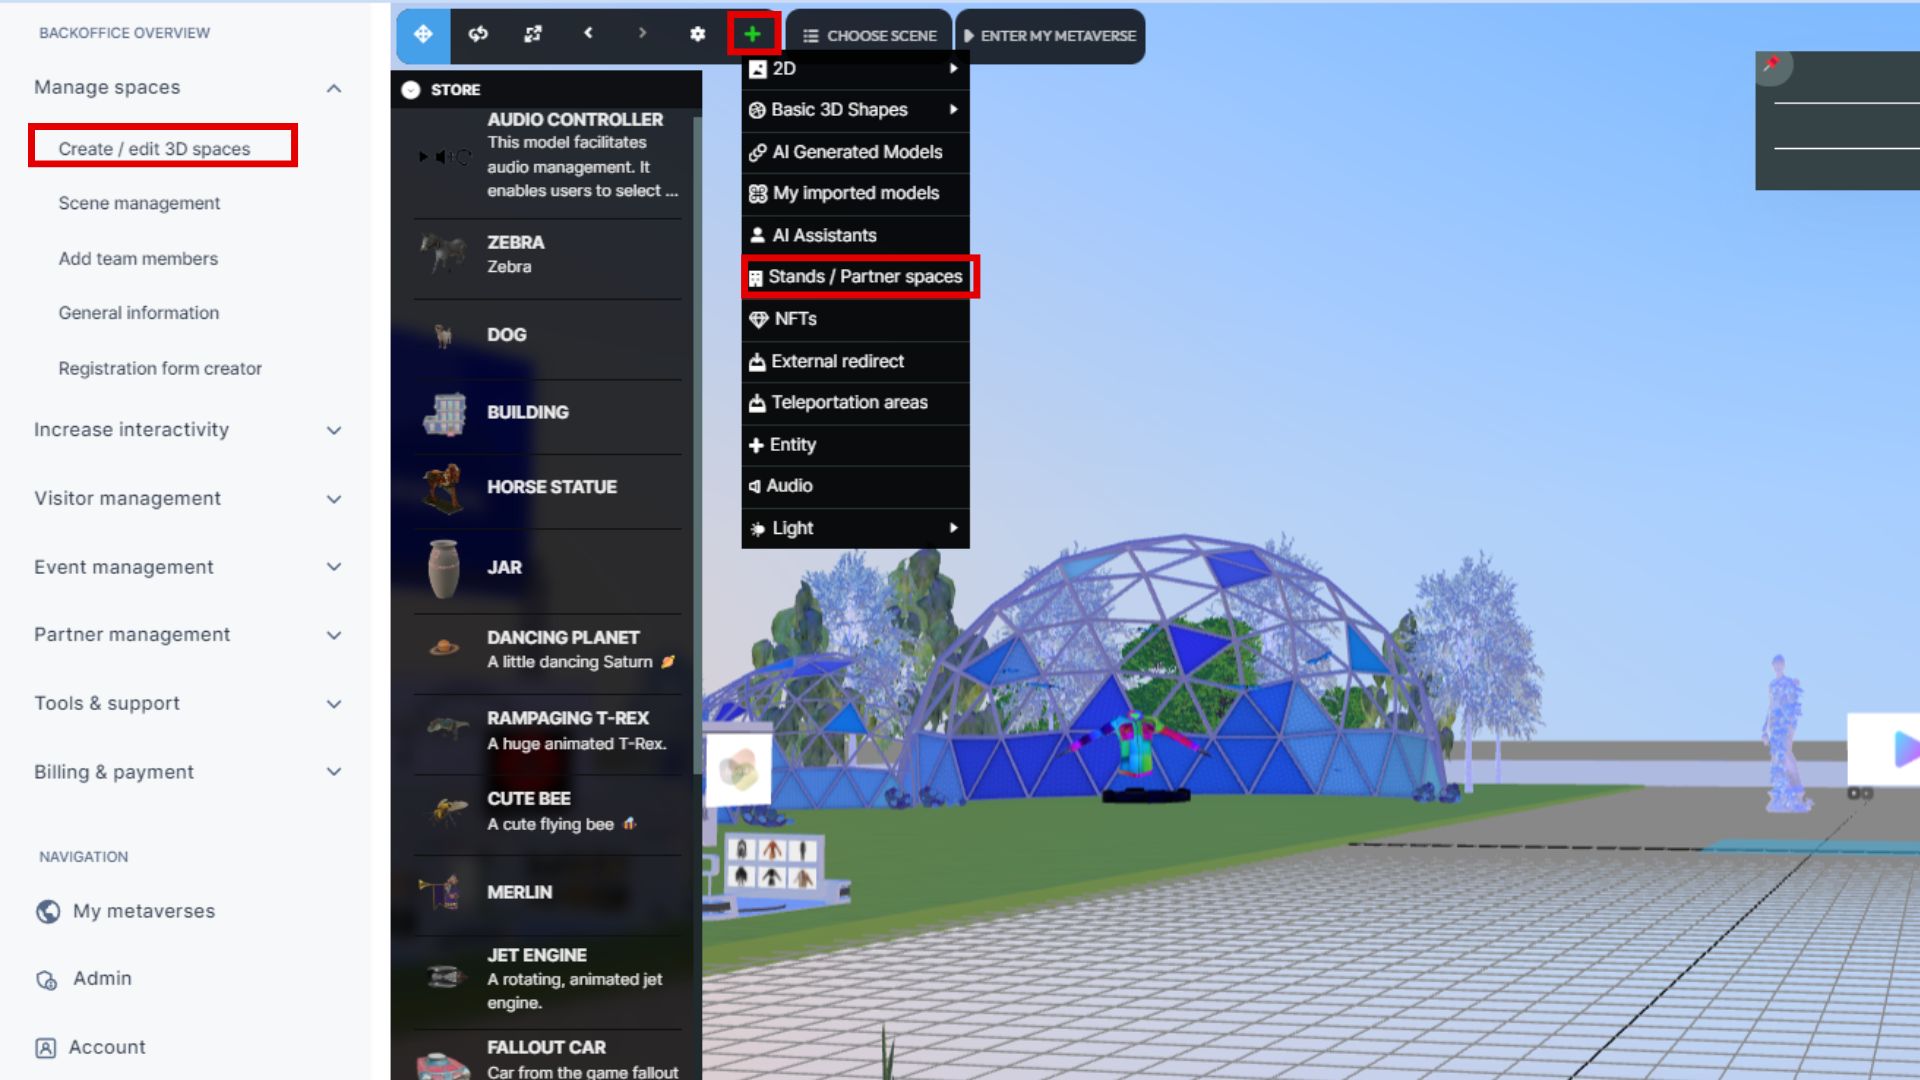
Then click on 'Stands/Partner spaces'

Next, select the partner space and stand you want to place and click on 'Add.' The stand will instantly appear, ready for positioning.
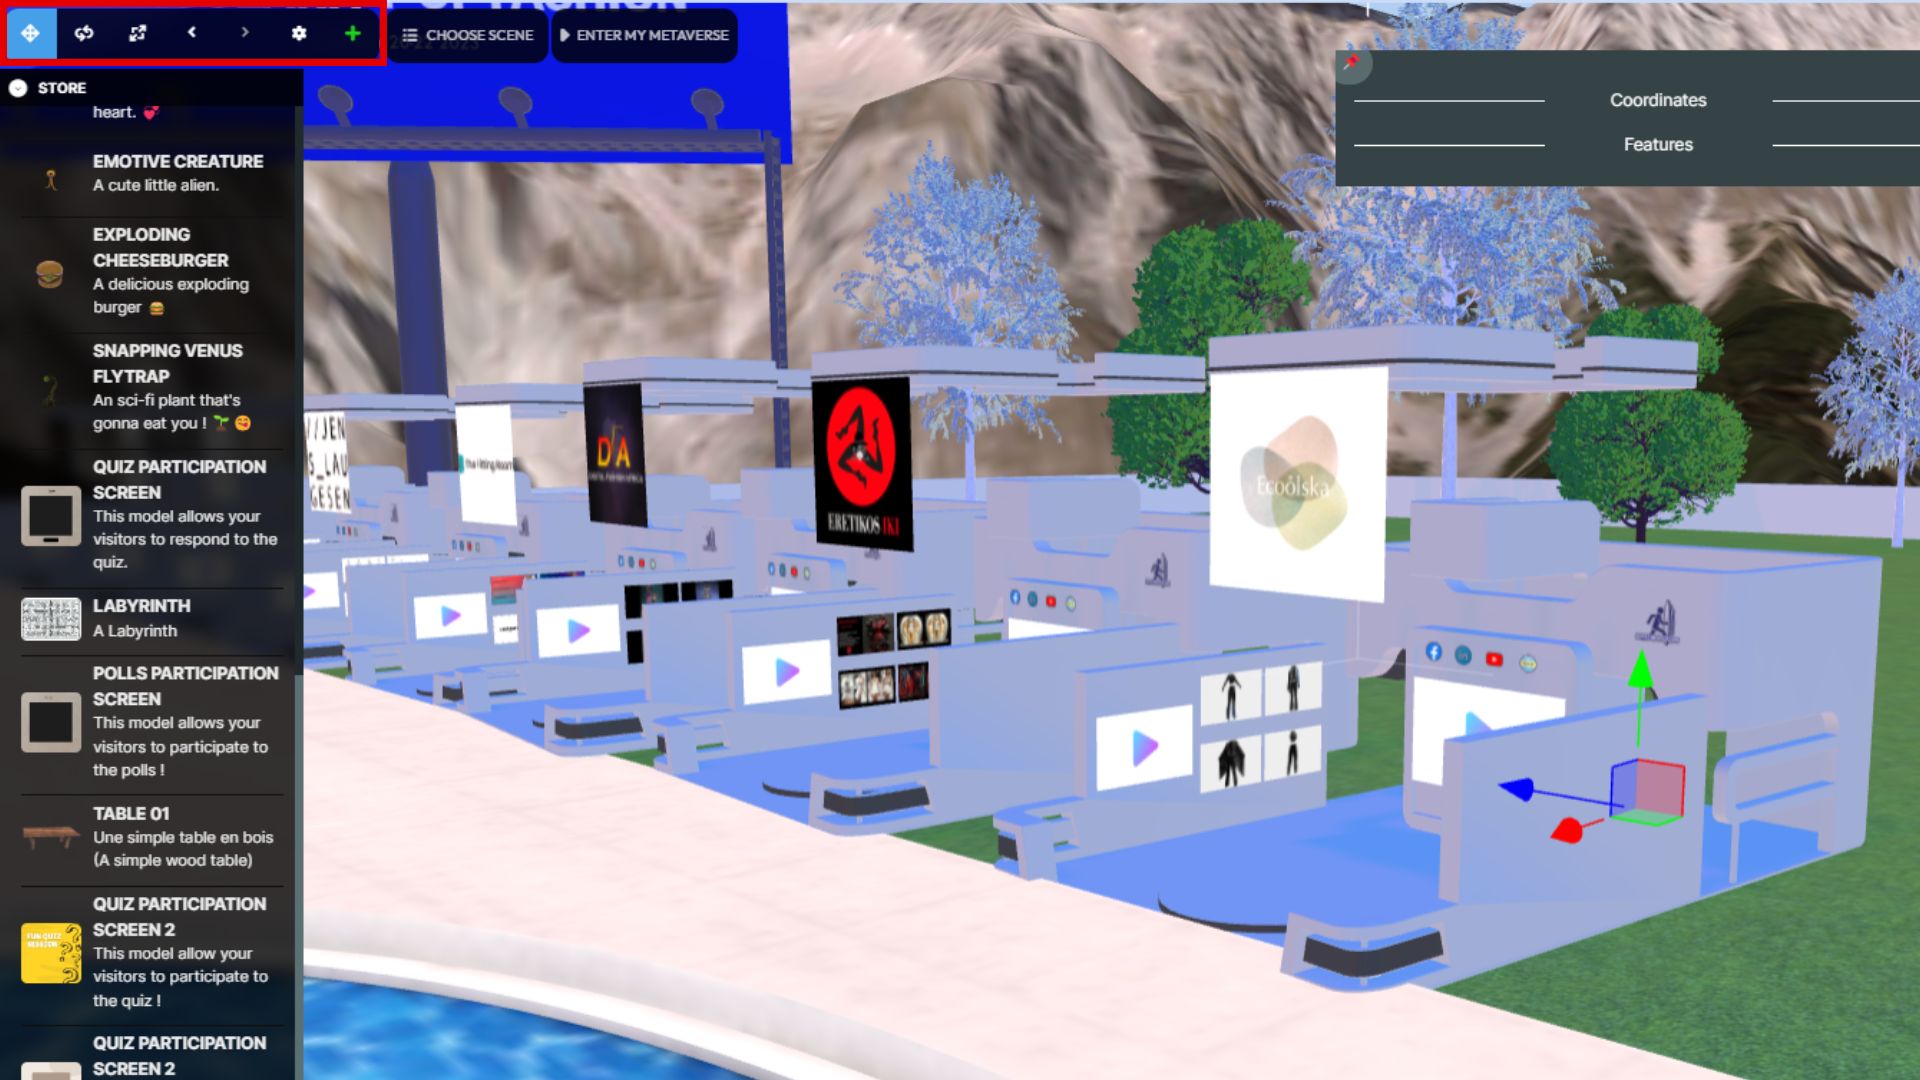
For precise placement, take advantage of the 'Translate' and 'Rotate' buttons. These tools allow you to position the booth within your 3D immersive space and metaverse, offering the flexibility to move and orient it as desired, much like manipulating a standard 3D object.
Access to your Partner and Exhibitor Back-offices:
As the administrator and moderator of the 3D immersive space and Metaverse, you have access to all partner and exhibitor Backoffices. Simply click the eye icon to open a partner or exhibitor's Backoffice.

• Explore your exhibitor's stand as a visitor by copying and pasting the 'Direct Access Link.'
• Access your exhibitor's dedicated Backoffice by clicking on 'Open Exhibitor Interface'
****
As a 3D immersive space and metaverse administrator and moderator, you wield complete control over your exhibitor and partner Backoffice. This includes the ability to modify content, set spaces and stands to private mode, or delete them entirely.
Partner’s and Exhibitor’s Backoffice
This section of the documentation is designed to assist your exhibitors and partners in editing and managing their dedicated space and stands.
Introduction to Partner’s Backoffice
Within the dynamic realm of Mext Platform's 3D immersive space and Metaverse, administrators hold the authority to design dedicated spaces for partners, shaping the environment into an immersive ecosystem for a diverse range of partners and visitors.
Partners, encompassing companies or independent entities within the 3D space and Metaverse, possess dedicated space inside the 3D immersive space and Metaverse and are equipped with their own Backoffice. This empowers them to independently manage content and visitors within the 3D immersive space and Metaverse under the governance of the administrator. Whether serving as exhibitors with stands in Metaverse Exhibitions or boutique owners in Metaverse Malls, partners engage in various use cases.
Partner spaces, spanning from stands and booths to boutiques and more, are dynamically generated by the 3D space and Metaverse administrator. While providing default configurations, partners have the freedom to customize these spaces to align with their specific preferences and use cases. This customization extends to personalizing the 3D environment, interactivity, and other relevant elements, accessible through the Partner and exhibitor interface, also known as the Partner and exhibitor Backoffice.
Partners and exhibitors possess the authority to manage and customize their spaces, stands, and associated showrooms. However, it's essential to note that they lack the ability to place and position these elements within the 3D immersive space and Metaverse or modify their shape and size without assistance from the administrator. Specific actions, such as placement and alterations to external aspects, remain exclusive to the administrator's purview.
This comprehensive document offers essential guidance for partners and exhibitors within a 3D immersive space and Metaverse, enabling them to effectively manage and personalize their dedicated spaces within the 3D immersive space and Metaverse.
Partner’s (Exhibitor’s) access to their Backoffice
Registration
To actively participate as a partner with dedicated space in the 3D immersive space and Metaverse, similar to an exhibitor, registration is a mandatory prerequisite. This process guarantees that you obtain the requisite access and management privileges for your stand or any other designated space within the 3D immersive space and Metaverse. Moreover, it is crucial to establish accounts for other members of your organization who will assume roles as administrators or representatives for your space and stand.
The registration process is as follows:
1. Visit the following link: https://mext.app/register
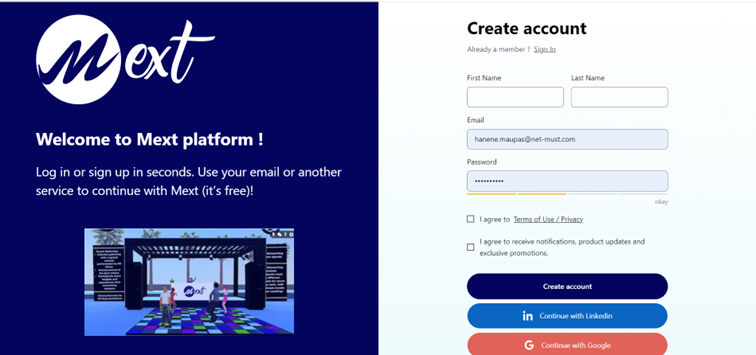
2. Sign up for the platform by providing your professional email address.
3. After creating your account, you will receive an email containing a link. Click on this link to activate your account. In case you do not find the activation email, please check your spam folder.
By following these straightforward steps, you'll complete your registration on the Mext platform and gain access to your partner space within your host's 3D immersive space and metaverse. Then, you'll be equipped with a partner Backoffice, enabling you to personalize and manage your immersive partner space to your preferences.
Navigating Your Partner’s (Exhibitor’s) Backoffice
After allocating or purchasing a stand or partner space within a specific 3D immersive space and Metaverse, you will receive an email containing a link to your partner space and stand’s Backoffice. This Backoffice functions as the administrative interface for your partner stand, providing the essential tools to manage and customize it according to your preferences.
Alternatively, you can access your partner space and stand's Backoffice through the following steps:
1. Visit the Mext website at mext.app.
2. Click on "Account and Access" in the top menu.
3. Select "Account" Note that this option becomes available only after completing the registration process and generating your stand.
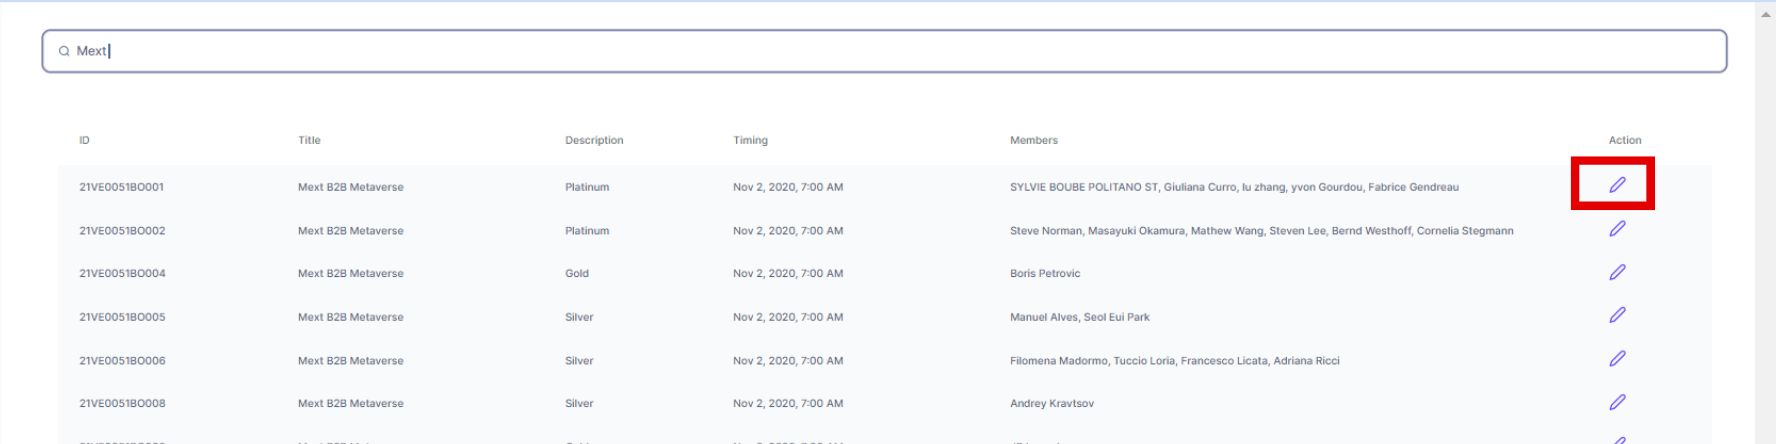
By following these straightforward steps, you can effortlessly access your stand's Backoffice, giving you complete control over the administration and customization of partner space and stand."


- Click the pencil icon to access the Backoffice..
Partner’s (Exhibitor’s) Backoffice Features
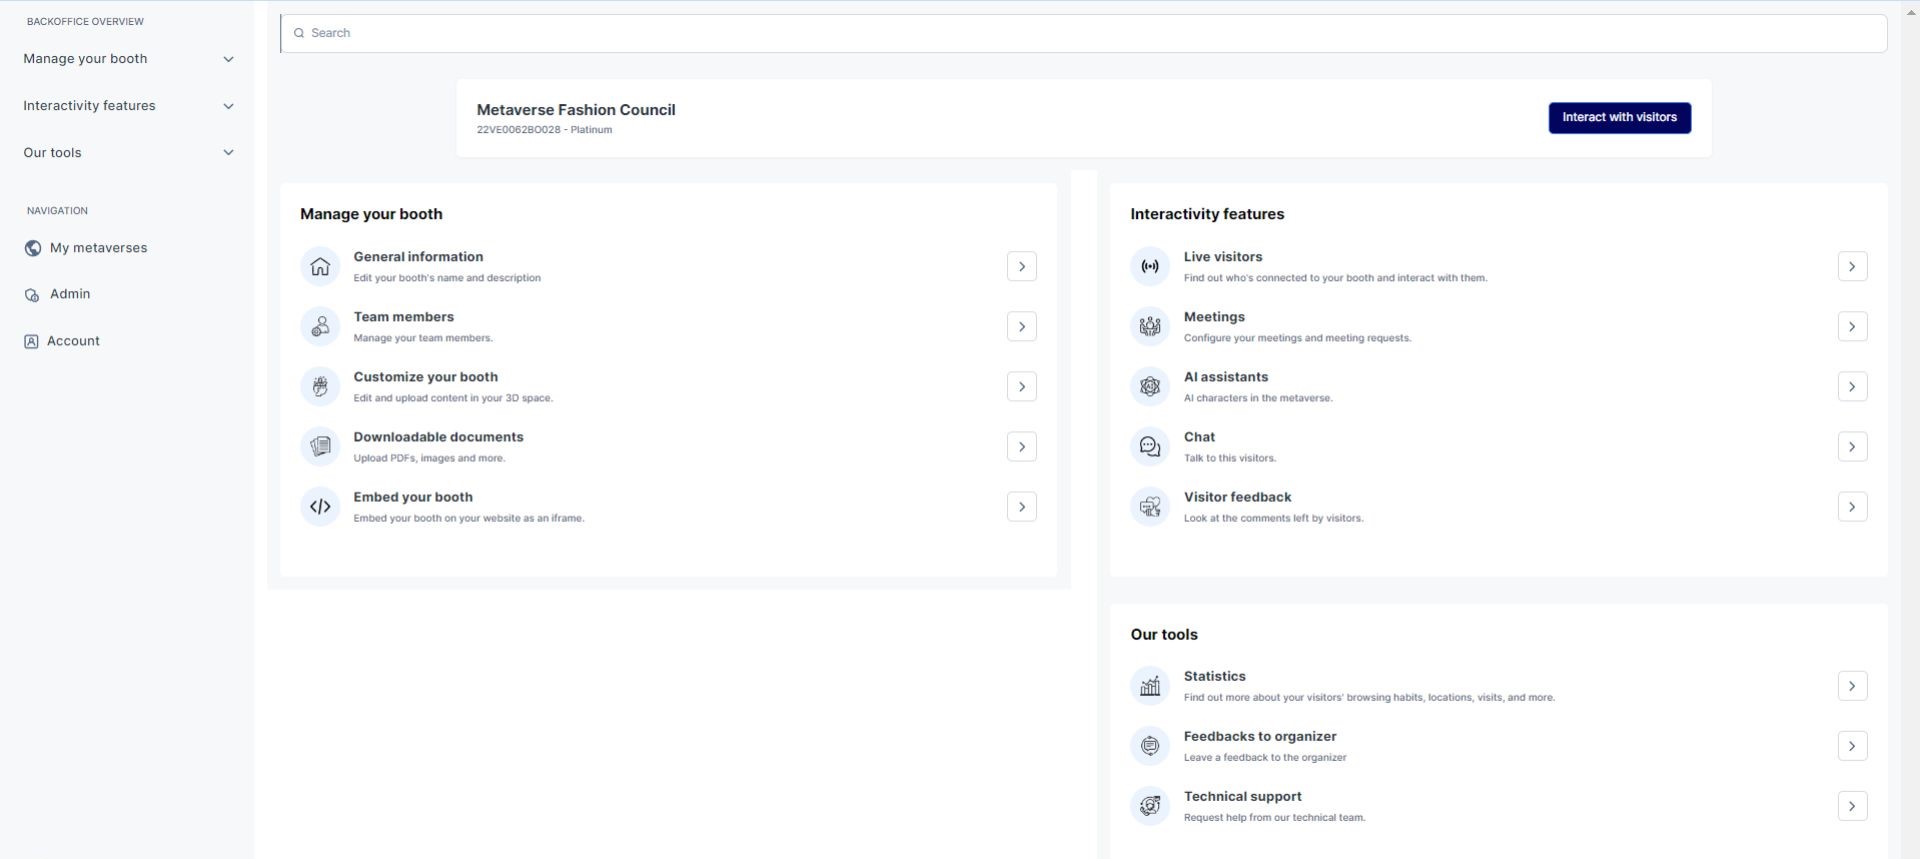
The Backoffice is comprised of 3 sections, each offering an extensive array of features crucial for the creation, construction, and management of your space and stand within the Metaverse. These sections provide a comprehensive range of tools and functionalities, ensuring a seamless and successful partner space and stand experience.
Recommendations: We strongly advise dedicating ample time to familiarize yourself with the platform's features and explore its capabilities. This initial exploration will empower you to fully leverage the platform's potential, enabling the creation of a space and stand that perfectly aligns with your objectives and requirements.+
- Utilize the "Share Link" button to easily share the showroom of your space (stand). Expand your digital space’s and stand's reach by sharing it on various platforms.
- Click on "View Booth" to directly access your booth and space within the Metaverse.
- Use the "Interact with Visitors" option to access the live visitors' interface directly, enabling you to interact with visitors currently in your booth.
Manage your booth (partner’s space)
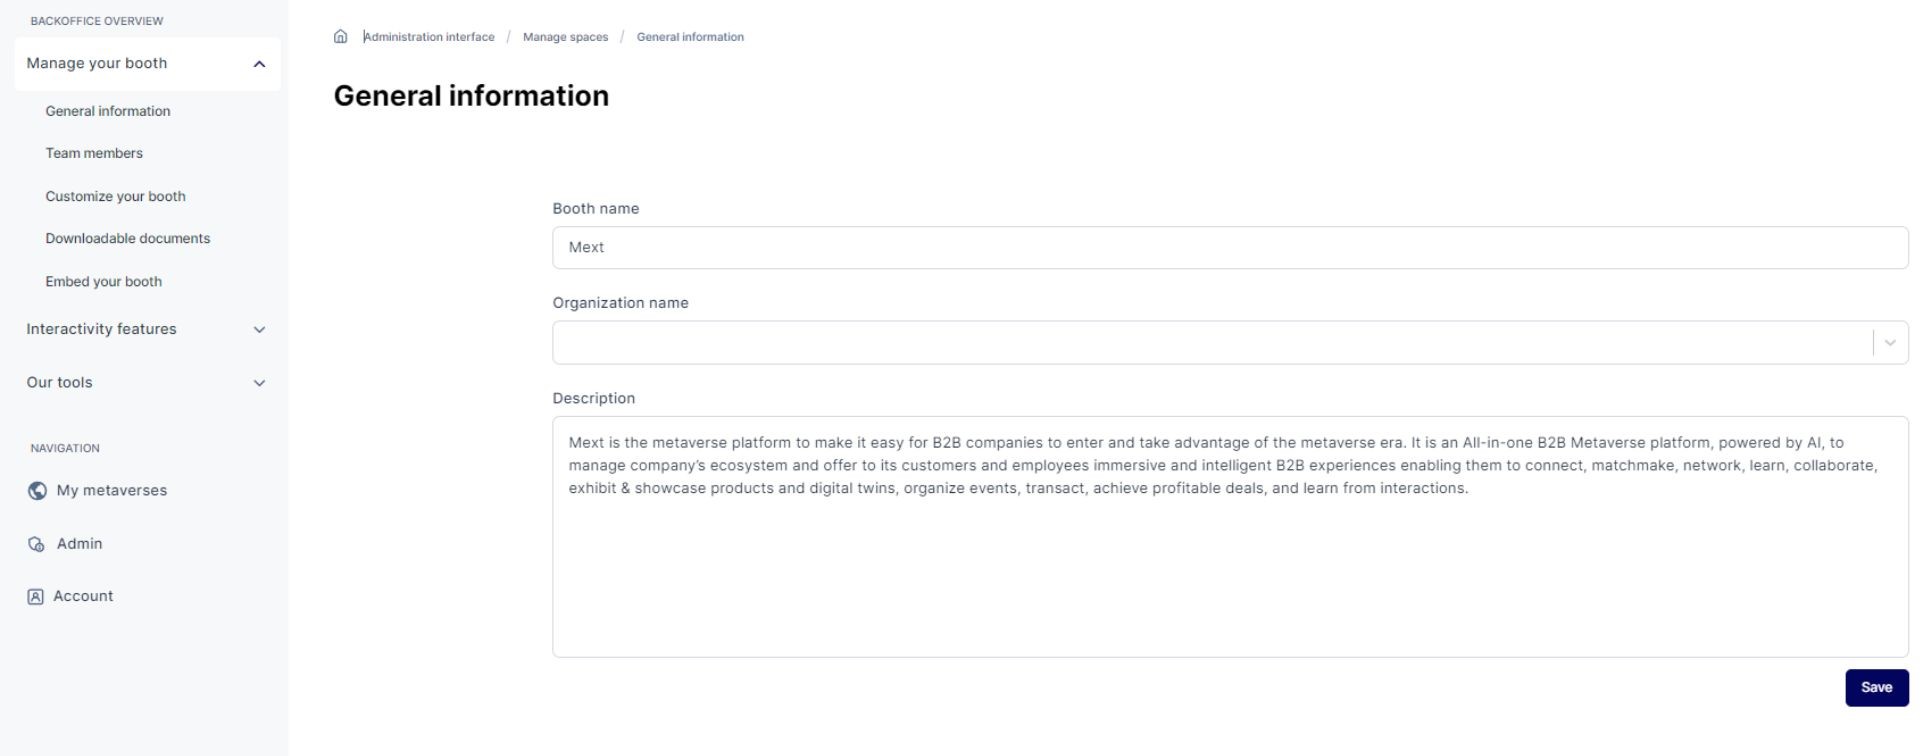
General Information
When selecting 'Principal Information,' please fill out the form. This information is visible to your space and stand visitors and contributes to the matchmaking criteria. Ensure the accuracy of the details for optimal results
Team Members
You can easily add members as administrators with full editing rights, or representatives who can assist in managing your space and interacting with visitors but cannot edit the content.
To add a new member, click on 'Add New Member”
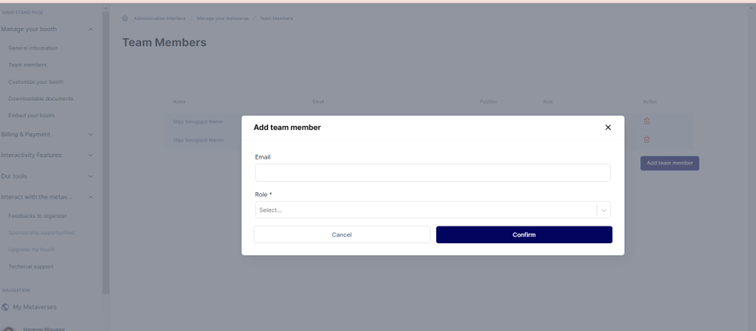
- Enter the email address of the person you want to add.
- Then, select their role and confirm.
Representatives will appear in the list of space/booth representatives that visitors can directly contact. If you're an admin planning to engage interactively with visitors, ensure to add yourself as a representative as well (twice, once as an Admin and once as a Representative)."
Customization
Your partner space and booth comprise two main components: an external 'Vitrine' and an internal Showroom. The external portion acts as an immediate showcase visible to visitors, strategically placed by the Metaverse administrator. On the other hand, the Showroom is a dedicated space accessible by visitors clicking on it, teleporting them inside. This feature enhances your ability to add more content and fosters greater intimacy with your visitors. The seamless transition from the external 'Vitrine' to the immersive interior of your Showroom creates an engaging and interactive experience for visitors within your stand.
Please be aware that you can integrate the showroom section into your website, providing your website visitors with a more interactive and modern experience.

A- The “Vitrine” Part
When you access the customization feature from your exhibitor Backoffice, the tool will initially load the "Vitrine" part as the default setting. Please note that the loading time may vary depending on the resources of your laptop and the speed of your internet connection.

Once the** "Vitrine"** is loaded, you can easily edit and update the content within the panels. Simply click on the panels to load or modify the desired content.

While you have the flexibility to edit all the panels, it's important to note that you cannot make changes to the shape or colors of your stand, nor can you add any 3D elements to the "Vitrine" section. These specific modifications can only be made by the Metaverse administrator. If you require any changes to the 3D aspects of your stand or the addition of 3D objects, it is necessary to contact the administrator directly for assistance.
B- The “Showroom” Part
To access to the “Showroom” part to modify it, you need to click on “CHOOSE SCENE” button on top right of your current scene and select “Showroom”
A you can see a new menu appear on the let of your scene
A compléter par Fabien comme ce qu’il a fait pour l’Admin interface
Downloadable documents
To provide downloadable documents for your customers within your stand, follow these simple steps:
1. Click on the "Downloadable Documents" section in your stand Backoffice.
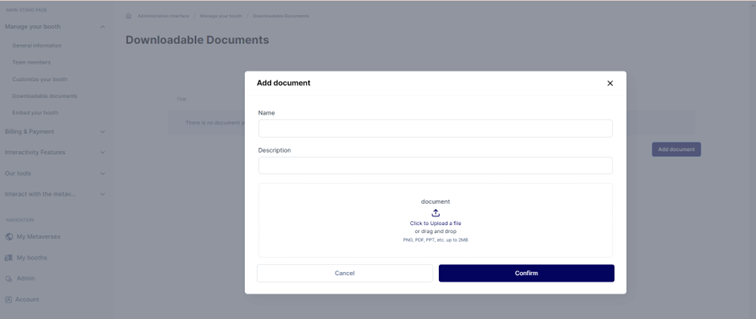
2. Add a new document by providing the following details:
- Enter the name of the document.
- Write a short description (we recommend keeping it to a single sentence).
- Upload the document file.
- Confirm the addition of the document.
3. Once confirmed, the document will be immediately available for your visitors to download.
****
You can upload documents in various formats such as PNG, PDF, PPT, and more. However, please ensure that the document size does not exceed 2MB to ensure smooth downloading for your visitors.

By making your documents available in this manner, you can offer valuable resources and information to your customers within your stand.
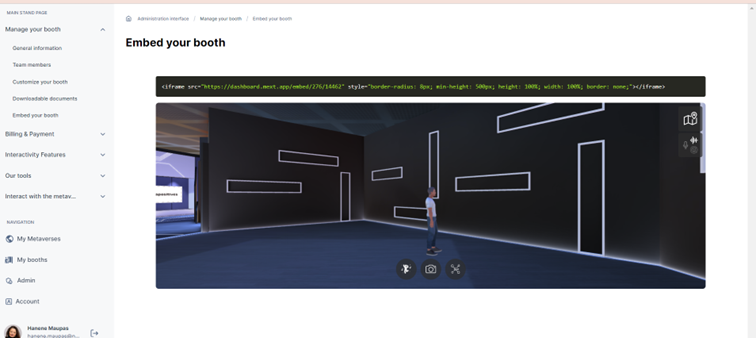
Embed your stand (onto your website).
Take advantage of the "embed" feature to seamlessly integrate your stand content into your website or other websites: